
Tiger Touch Release Notes
Versions-Entwicklung
| Version | Release Date | Details |
|---|---|---|
| 4.1 | 29/04/11 | Fehlerbehebungen gegenüber v4.0 Neue Features Verbesserungen Behobene Fehler |
| 4.0 | 31/01/10 | Neue Features incl. Undo und Blind Neue Features Verbesserungen Änderungen Behobene Fehler |
| 3.1 | 17.06.10 | Service-Update für Version 3 mit Verbesserungen der Benutzbarkeit sowie dem Beheben von Fehlern Verbesserungen Änderungen Behobene Fehler Bekannte Probleme |
| 3.0 | 31.03.10 | Anpassung für das Touch Wing, neues Fenster-System Neue Features Verbesserungen Änderungen Behobene Fehler Bekannte Probleme |
| 2.0 | 01.10.09 | Erste Version der Tiger Touch Software Neue Features Verbesserungen Änderungen Behobene Fehler Bekannte Probleme |

-
Upgraden von Version 2.0:
Es gibt keine direkte Upgrade-Möglichkeit von Versionen älter als 3.0, daher muß die Software mittels der Wiederherstellungs-CD/Stick installiert werden. Ein Image der Wiederherstellungs-CD/Stick mit der aktuellen Version ist erhältlich auf der Avolites Downloadseite. Bitte folgen Sie den beim Download erhältlichen Anweisungen, um die Wiederherstellungs-CD zu erstellen und das System zu installieren. -
Upgraden von Version 4.0:
Bitte sichern Sie zunächst Ihre vorhandenen Shows, bevor Sie mit dem Upgrade beginnen. Es gibt ein automatisches Upgrade von Version 4.0 auf Version 4.1 (für ältere Versionen benötigen Sie eine Wiederherstellungs-CD). Die aktuelle Titan-Software steht auf der Avolites Downloadseite zum Download bereit.
Eine ausführliche Anleitung für das Upgrade (sowohl automatisch als auch per Wiederherstellungs-CD) erhalten Sie mit dem Download sowie in der Bedienungsanleitung des Pultes. Das automatische Upgrade ist hier kurz beschrieben.
Speichern Sie zunächst das heruntergeladene Software-Paket auf einem USB-Stick. Schließen Sie nun die laufende Pult-Software per Befehl 'Shutdown Software' aus dem Menü 'Tools'. Verbinden Sie nun den USB-Stick mit dem Pult und klicken Sie auf das gelbe 'Folders'-Symbol aus dem Menü 'Tools'. Navigieren Sie zu dem neuen Programmpaket auf dem USB-Stick und klicken Sie doppelt darauf, um es zu starten. Folgen Sie den Anweisungen, die das Installationsprogramm einblendet, lesen Sie diese genau! Ist das Installationsprogramm abgeschlossen, muß das Pult neu gestartet werden. Nach dem Neustart läuft Ihr Pult mit der neuen Software-Version - im 'System'-Modus wird im Display die neue Versionsnummer angezeigt,

- Fehler in der Speicherverwaltung auf 'Touch'-Pulten:
Auf 'Touch'-Pulten konnte es zu Fehlern in der Speicherverwaltung kommen, wenn ein Chaser (Lauflicht) über mehrere Tage lief und die Ansicht 'Chase View' geöffnet war. Falls der Chaser 'getrennt' wurde, so wurde der Speicherplatz freigegeben; anderenfalls konnte es nach mehreren Tagen zum Speicherüberlauf kommen.
- Verzögerungen bei geöffneten Ansichten 'DMX' und 'Channel Grid':
Das Pult konnte verzögert reagieren, wenn sowohl die Ansicht 'DMX' als auch das 'Channel Grid' gleichzeitig geöffnet waren. Dies trat nur auf, wenn sich die Werte angezeigter Kanäle änderten.
- Pulte friert ein, wenn Shapes (Abläufe)
aus dem Programmer gelöscht werden:
Sehr selten konnte es vorkommen, daß die Software 'einfror', wenn Shapes aus dem Programmierspeicher gelöscht wurden.
- Fadersteuerung für Shape-Größe und Geschwindigkeit
funktionierte nicht in Cue-Listen:
Das Steuern von Größe und Geschwindigkeit von Shapes (Abläufen) per Fader funktionierte nicht in Cue-Listen.
- Gleichzeitiges Starten von Cues per Timecode
und durch den Benutzer:
Die Software konnte 'einfrieren', wenn ein Cue gleichzeitig per Timecode und durch den Operator gestartet wurde.
- Speicherverwaltungs-Fehler:
Es gab einen Fehler in der Speicherverwaltung, der zu einer Fehlermeldung führte, wenn das Pult länger als zwei Tage ununterbrochen lief.

- Deutsches Sprachpaket:
Die Sprache der Pultoberfläche läßt sich nun per 'Tools'-Menü ändern. Dies ist nur verfügbar, wenn die Pult- Software per Recovery-CD/Stick aktualisiert wurde (Anm. d. Übers.: das deutsche Sprachpaket funktioniert auch bei 'kleinem' Update von 4.0 auf 4.1).

- Überblenden der Shape-Phase:
Die Phase von laufenden Shapes blendet in Cues nun deutlich weicher über als vorher.
- Undo / Redo:
Es lassen sich bis zu 20 Schritte rückgängig machen bzw. wieder aufrufen. Die betrifft folgende Aktionen:
- Geräteauswahl
- Attributeinstellungen (z.B. Pan, Tilt, Farben)
- Locate
- Clear
- Eingaben mit der Tastatur
- Aufrufen von Paletten
- Auswahl von Gruppen
- Off
- Align
- Flip
Zum Rückgängigmachen oder Wiederaufrufen von Schritten halten Sie die 'Shift'-Taste (AVO) gedrückt und betätigen dazu die Taste 'Undo' bzw. 'Redo' an der unteren rechten/linken Ecke des Tastenblocks. Auf dem Tiger Touch, Titan Mobile und dem weißen Pearl Expert sind diese Tasten mit 'Undo' und 'Redo' gekennzeichnet; auf älteren (schwarzen) Pearl Experts sind das die 'Pfeil links' bzw.'Pfeil rechts'-Taste. - Blind Programmieren:
Blind Programmieren bedeutet, mit dem Programmierspeicher zu arbeiten, ohne daß die Änderungen live auf der Bühne sichtbar sind. Dazu halten Sie die AVO-Taste gedrückt und drücken dazu die Menütaste [Blind] (auf dem Titan Mobile gibt es eine Extra-Taste 'Blind'). Nun haben Sie einen neuen, leeren Programmierspeicher, während der 'normale' Programmierspeicher erhalten bleibt und weiter die Bühne steuert. Sämtliche Änderungen im 'Blind'-Programmierspeicher werden im Visualizer gezeigt, und die betreffenden Werte erscheinen in den entsprechenden Fenstern (z.B. Channel Grid) und über den Rädern, aber nicht auf der Bühne. Damit lassen sich neue Szenen abspeichern und existierende ändern. Alle anderen aktiven Szenen steuern weiterhin die Bühne.
Zum Beenden des Blind-Modus halten Sie wieder die AVO-Taste gedrückt und betätigen dazu die Menütaste [Blind]. - Blind-Vorschau:
Vor dem wirklichen Aufruf einer Szene läßt sich deren Inhalt im Visualiser überprüfen, indem Sie diese auf 'Output blind' stellen. Dazu wählen Sie [Playback Options], dann die entsprechende Szene, und schließlich die Option [Blind]. Auf dem Titan Mobile halten Sie die Taste 'Blind' gedrückt und wählen dazu die Szene. Wenn Sie nun die Szene aufrufen, so werden deren Einstellungen nicht zu den richtigen Geräten, sondern zum Visualiser geschickt. Wiederholen Sie die Schritte, um die Szene wieder auf 'Live' zu schalten.
- 'Blind' DMX-Ausgang:
Sie können einzelne DMX-Ausgangsmodule so einstellen, daß sie nicht die 'Live'-DMX-Signale senden, sondern die 'Blind'-Signale. Damit läßt sich etwa ein part ArtNet angeschlossener Visualisierer zur Vorschau im Blind-Modus verwenden. Dazu schalten Sie das Pult in den System-Modus, wählen [DMX Settings] und klicken auf die Schaltfläche [i] des betreffenden DMX-Moduls. Nun läßt sich im Einstellungsbereich die Einstellung [Blind DMX] wählen.
- BeZeichnungen:
Schaltflächen lassen sich nun nicht nur beschriften, sondern auch ganz einfach bemalen - erstellen Sie eine Picture Legend oder BeZeichnung. Drücken Sie dazu [Set Legend], betätgen die gewünschte Schaltfläche, und wählen entweder im Menü [Picture] oder das Stift-Symbol im Zeichenbereich. Strichstärke, Farbe sowie ein 'Radiergummi' stehen zur Verfügung, mit <Enter> wird die Zeichnung gespeichert. Ebenso lassen sich vorgefertigte Zeichnungen aus der mitgelieferten Bibliothek verwenden, wenn Sie das 'Bilderrahmen'-Symbol wählen.
- Kurven für den Fan-Modus:
Bei der Anwendung des Fan-Modus lassen sich nun verschiedene Kurven wählen. Dazu halten Sie die 'Fan'-Taste gedrückt, wählen im Menü [Curve] und dann die gewünschte Kurve. Es stehen folgende Optionen zur Verfügung:
-
Line (Linie) - traditioneller Fan-Modus, das erste und letzte gewählte Gerät werden um den
gleichen Betrag, aber in umgekehrter Richtung, verändert, das mittlere Gerät bleibt unverändert.
Am besten für Pan geeignet.
-
Pull Middle (Mitte gezogen) - Das erste und letzte geählte Gerät bleibt unverändert,
die Mitte wird am meisten beeinflußt. Geeignet z.B. für Dimmer, Farbmichung oder Tilt.
-
Pull Ends (Enden gezogen) - Das erste und letzte Gerät werden in der gleichen Richtung
gleich stark verändert, die Mitte bleibt gleich. Sinnvoll z.B. für Dimmer, Farbmischung oder Tilt.
-
Arrow (Pfeil) - Das erste und letzte Gerät werden entgegengesetzt zur Mitte verändert.
Anwendung: Farbmischung, Tilt, Dimmer.
-
Line (Linie) - traditioneller Fan-Modus, das erste und letzte gewählte Gerät werden um den
gleichen Betrag, aber in umgekehrter Richtung, verändert, das mittlere Gerät bleibt unverändert.
Am besten für Pan geeignet.
- Fan aufteilen:
Beim Benutzen der Fan-Funktion läßt sich der Effekt auf die gewählten Geräte aufsplitten. Wählen Sie die Geräte, halten Sie die Taste 'Fan' und drücken Sie eine Zifferntaste, um anzugeben, in wieviele Gruppen der Fan-Effekt aufgeteilt werden soll.
- Fan und Gruppen:
Der Fan-Modus läßt sich nicht nur auf eine Anzahl einzeln ausgewählter Geräte, sondern auch auf Gruppen anwenden. Halten Sie dazu die Taste 'Fan' gedrückt und wählen mit der [Options]-Taste die gewünschte Funktion:
- Ignore Groups (Gruppen ignorieren) - Jedes Gerät wird individuell gehandhabt, egal ob es einzeln oder als Gruppe ausgewählt wurde. Dies ist die Normaleinstellung.
- Fan Group as Fixture (Gruppen als Geräte) - Jede Gruppe wird als ein Gerät gehandhabt, alle Geräte der Gruppe werden gleich verändert.
- Fan Within Group (Fan innerhalb der Gruppe) - Geräte, die in einer Gruppe ausgewählt wurden, werden innerhalb der Gruppe separat gehandhabt.
- 'Drücken-und-Halten' für den Fan-Modus:
Es gibt eine neue Benutzereinstellung, um das bisherige 'Einrasten' der Fan-Funktion zu verhindern: ist diese gesetzt, muß man für 'Fan' die Fan-Taste gedrückt halten. Damit läßt sich einfacher arbeiten, und vor allem wird ein versehentliches Anwenden des Fan-Modus auf andere Attribute verhindert.
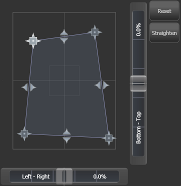
- Steuerung für Keystone und Blendenschieber:
Beinhalten Geräte auch eine DMX-gesteuerte Keystone-Korrektur (Kissenentzerrung) oder Blendenschieber, so können diese Attribute nun noch einfacher und intuitiver im Attribut-Editor gesteuert werden. Dazu wählen Sie [Keystone] oder [Blades] als zu steuerndes Attribut, und können nun ganz einfach auf dem Bildschirm z.B. die Ecken oder Kanten ziehen und schieben.
- Attribute festsetzen (Freeze):
Einzelne Attribute oder komplette Geräte können festgesetzt (freezed) werden, und werden dann weder von Szenen/Cues noch vom Programmierspeicher gesteuert. Um ein Attribut oder Gerät festzusetzen, wählen Sie 'Patch', dann [Edit Fixtures], dann [Freeze Fixture or Attribute]. Nun lassen sich die betreffenden Geräte und Attribute auswählen.
- Tastatursteuerung: Thro, And und @:
Die Tasten Thro, And and @ lassen sich nun auch direkt im Hauptmenü verwenden, um etwa Geräte auszuwählen oder deren Helligkeit zu bestimmen. Das funktioniert auch mit der Locate-Funktion, also z.B. '5 Locate', 'Group 7 Locate' etc.
- Zuordnung der DMX-Ausgänge:
Die Zuordnung der DMX-Ausgänge erfolgt nun nicht mehr über Tools->Switch Tasks->Titan->DMX-Settings, sondern im System-Modus über das Menü [DMX Settings]. Auf dem Bildschirm erscheint eine Liste der verfügbaren DMX-Module sowie der internen 12 DMX-Linien. Aktivieren Sie die Schaltfläche 'Assign' des gewünschten DMX-Moduls, und wählen Sie eine oder mehrere Linien. Einzelne oder alle DMX-Module können über eine gesonderte Schaltfläche wieder von den Linien gelöst werden. Mit der Schaltfläche [i] stehen Informationen und Einstellungen der einzelnen DMX-Module zur Verfügung, die über das Kontext-Menü verändert werden können.
- DMX-View:
Es gibt nun ein gesondertes Arbeitsfenster mit einer Übersicht über alle DMX-Kanäle und deren Werte. Dies wird aufgerufen mit '[Open Workspace Window], [DMX].
- Sprachunterstützung:
Für die Software-Menüs sind nun verschiedene Sprachen einstellbar; aktuell verfügbar sind Englisch, Russisch, Chinesisch, Spanisch und Portugiesisch. Um die Sprache zu wechseln, müssen Sie zunächst die Wiederherstellungs-CD laufen lassen, und wählen dann aus dem Tools-Menü [Control Panel], [Languages].
- Reihenfolge der Geräte in Shapes:
Wird ein Shape auf mehrere angewählte Geräte angewendet, so erfolgt dies in der Reihenfolge, in der die Geräte angewählt wurden; diese Reihenfolge gilt auch für die Phasen-Einstellung. Die Reihenfolge der Geräte läßt sich nun auch bei bestehenden Shapes ändern: wählen Sie [Edit], [Fixture Order]. Ordnet man verschiedenen Geräten den gleichen Schritt zu, solaufen diese Geräte synchron.
- Größe der Schaltflächen, Textgröße:
Die Schaltfläche [i] in der Titelleiste jedes Fensters ruft die verfügbaren Optionen für dieses Fenster auf. Damit lassen sich etwa Größe und Position des Fensters, aber auch die Größe der schaltflächen und die Textgröße einstellen.
- Autoloads speichern:
Autoloads (Aufrufe von kompletten Szenen/Cues in Cuelisten) lassen sich nun bedeutend einfacher und schneller anlegen: im Menü 'Record Cue List' wählen Sie [Advanced Options] und aktivieren die Einstellung [Autoload Live Playbacks]. Damit werden aktivierte Szenen/Cues als Autoloads eingefügt, sobald ein Schritt in eine Cue-Liste eingefügt wird. Das vorherige Prozedere (leere Schritte einfügen, dann die Autoloads zuordnen) ist damit deutlich vereinfacht worden.
- Kontrollfenster der Texteingabe:
Beim Editieren von Textfeldern mit Hilfe der Bildschirmtastatur erscheint nun oberhalb derselben ein Feld mit dem aktuell bearbeiteten Eintrag, der aktuellen Cursor-Position und der Auswahl.
- Automatische Großschreibung:
Für die Bildschirmtastatur läßt sich die automatische Großschreibung von Wörtern aktivieren; damit wird der erste Buchstabe jedes Worts großgeschrieben. Betätigen Sie dazu die Taste 'Caps Lock' (Umschalt-Einrasten), bis als seine Bezeichnung 'Abc' eingeblendet wird.
- Timecode-Fenster:
Es gibt ein neues Arbeitsfenster zur Anzeige des Timecodes. Es zeigt den aktuellen Timecode der gerade angewählten Quelle; ferner läßt sich die Quelle aktivieren und deaktivieren sowie der interne Timer starten, anhalten und zurücksetzen.
- Tastaturkürzel für Arbeitsfenster:
Mittels der Taste 'View' (beim Titan Mobile: 'Open') und einer der folgenden Tasten kann das jeweilige Arbeitsfenster (Workspace Window) aufgerufen werden; dabei blinken die LEDs der jeweiligen Tasten, um zu zeigen, welche auswahlmöglichkeiten es gibt):
- Attribute Bank – öffnet das Paletten-Fenster der jeweiligen Bank.
- Fixture/Channel - öffnet das Fenster 'Fixtures'.
- Group - öffnet das Fenster 'Groups'.
- Macro – öffnet das Fenster 'Macros'.
- Patch – öffnet das Fenster 'DMX View'.
- Connect – Öffnet das 'Cue View'-Fenster der gerade verbundenen Cue-Liste.
- Attribute Options - öffnet den Attribute Editor.
- Sämtliche Menüs verlassen:
Mit der Tastenkombination <AVO> + <EXIT> gelangt man aus jedem Menü direkt in das Hauptmenü, muß also nicht <Exit> mehrfach drücken.
- Release-Zeit:
Die Zeit, in der eine Szene released (freigegeben) wird, läßt sich nun per Menü vorgeben. Im 'Off'-Menü (Titan Mobile: Release) gibt es eine Option für die generelle Zeit (Master Release Time). Dies ist der Vorgabewert für alle manuellen Freigaben. Zum einmaligen Überschreiben geben Sie im Hauptmenü eine Zeit in Sekunden ein (wie eine Überblendzeit bei Paletten), drücken <Off> (bzw. <Release>) und dann die Auswahltaste der jeweiligen Szene.
- Den Programmierspeicher freigeben/ausblenden:
Der Programmierspeicher läßt sich ausblenden und gleichzeitig zu den aktiven Szenen/Cues zurückgehen. Dazu drücken Sie erst <Off> (bzw. <Release>) und dann <Clear>. Ausblendzeit ist die Master Release Time. Diese kann für den jeweiligen Ausblendvorgang überschrieben werden, indem Sie als erstes eine zeit (in Sekunden) eingeben, etwa '6 Off Clear'. Dies gilt nur für Kanalwerte, nicht für Paletten.
- Record-Taste:
Beim Titan Mobile gibt es nur eine einzige 'Record'-Taste; zum Speichern drücken Sie einfach nur 'Record' und wählen den gewünschten Speichertyp (Memory/Cue, Chase, Cuelist). Um eine Gruppe, Palette, ein macro oder eine Arbeitsumgebung (Workspace) zu speichern, drücken Sie <Record>, gefolgt von <Palette>, <Group>, <Macro> bzw. <View>. Ebenso läßt sich die Schnellspeicherfunktion verwenden, um einen gewünschten Eintrag direkt auf eine freie Schaltfläche abzuspeichern.
- Geräte aus dem Programmierspeicher entfernen:
Geräte und Gruppen lassen sich nun schnell aus dem Programmierspeicher entfernen: halten Sie dazu <Clear> gedrückt und betätigen Sie dazu die entsprechende Geräte-/Gruppenauswahltaste.
- Abschalten des Trackings für Cue-Listen:
Es gibt nun eine neue Playback-Option, um für einzelne Cue-Listen das Tracking zu deaktivieren.
- Active Fixtures updaten:
Active Fixtures lassen sich updaten, etwa wenn sich die Clips auf dem Medienserver geändert haben. Drücken Sie dazu <Patch>, dann [Update Personality], und wählen das betreffende Active Fixture.
- Active Fixtures verbinden (Link):
Ein 'normal' gepatchtes Gerät läßt sich nun mit einem Active Fixture verbinden, um z.B. die Vorschaubilder der Clips aufs Pult zu bekommen. Dazu drücken Sie <Patch>, [Active Fixture], wählen das entsprechend Active Fixture und patchen es auf die gleiche Geräteauswahl-Schaltfläche, auf der das bisherige Gerät gepatcht ist.
- Löschen von Szenen außerhalb des Timecode-Bereichs:
Mit dieser Benutzereinstellung werden Szenen, deren Timecode außerhalb der aktuellen Timecode-Zeit liegt, ausgeblendet. Zum aktivieren dieser Einstellung wählen Sie [Timecode] aus den Benutzereinstellungen.

- Löschen und Verschieben von Workspaces:
Um Workspaces (Arbeitsumgebungen) zu löschen, zu verschieben oder zu kopieren, muß nun <View> gedrückt werden. Damit lassen sich Workspaces verändern, während man sich im Menü 'Delete' bzw. 'Copy/Move' befindet. Um einen Workspace zu kopieren, drücken Sie <View>, <Copy>, dann den zu kopierenden Workspace und schließlich die Ziel-Schaltfläche, auf die er kopiert werden soll.
- Titan Fenster-Optionen (Window Options):
Die Fensteroptionen (Window Options) wurden entfernt, da nun sämtliche Einstellungen über das jeweilige Kontextmenü bzw. die Schaltfläche [i] einstellbar sind.
- Geräte zu einem Shape hinzufügen/aus einem Shape löschen:
Zu einem bestehenden Shape lassen sich weitere Geräte hinzufügen bzw. Geräte aus diesem löschen: im Shape Generator wählen Sie [Edit], dann [Add/Remove Fixture], und wählen das Gerät, das Sie hinzufügen/löschen möchten. Bitte beachten: Sie können nicht sämtliche Geräte aus einem Shape entfernen. Wollen Sie einen Shape komplett auf eine andere Geräte gruppe übertragen, fügen Sie zunächst die neuen Geräte hinzu und löschen dann die alten Geräte aus dem Shape.
- Verbesserungen beim Über-/Ein-/Ausblenden:
Beim Ein-/Aus-/Überblenden wurden die Algorithmen verbessert, so daß sich nun schnellere und bessere Blendvorgänge ergeben.
- Beschleunigung der Räder:
Die Empfindlichkeit der Räder und die Schaltschwellen für Pan und Tilt lassen sich nun über die benutzereinstellungen anpassen (User Settings -> [Wheel Sensitivity]).
- Einstellungen
für MIDI-Timecode:
Fehlererkennung, Toleranz und Timeout lassen sich über User Settings, [Timecode], [MIDI Timecode] einstellen.
- Automatisches Verlassen des Fan-Modus:
Um ein unbeabsichtigtes Anwenden des Fan-Modus zu verhindern, wird der Modus beim Wechseln der Attributbank oder der Auswahl anderer Geräte automatisch verlassen. Siehe auch 'Drücken-und-Halten' weiter oben.
-
Flashen einer 'aufgeklappten' Szene (unfold):
Einzelne Cues aus einem aufgeklappten Lauflicht (unfolded chase) lassen sich nun flashen, um das Ergebnis live überprüfen zu können.
- Der Playback View behält verbundenes (connected) Playback:
Beim Neustart des Pultes zeigt das Fenster 'Playback View' nun das gleiche Playback, das vor dem Neustart ausgewählt war.
- <Enter> zur Auswahl eines Arbeitsfensters:
Mit <Enter> wird nun direkt der erste Eintrag in der Liste der Arbeitsfenster ([Open Workspace Window]) ausgewählt. Mit der Schnellsuche lassen sich damit sehr schnell einzelne Fenster ansteuern; so öffnet z.B. 'Vis <Enter >' das Visualiser-Fenster.
- Geändertes Verzeichnis für die Show-Daten:
Die Show-Daten werden nun in einem Verzeichnis 'Titan Show File' im Ordner 'My Documents' gespeichert. Damit hat man einen sehr schnellen Zugriff: drücken Sie [Tools] (oben links auf dem Bildschirm), dann [Folders], und können nun direkt das Verzeichnis 'Titan Show File' öffnen.
- Reaktionszeit bei Vielfachauswahl:
Die Reaktionszeit bei der Auswahl sehr vieler Geräte etwa per '1 THRO 1000' konnte bis zu einer Sekunde betragen; dies funktioniert nun deutlisch schneller.
- Reaktionszeit derm Schaltflächen:
Die Reaktionszeit beim Betätigen einzelner Schaltflächen wurde verbessert.
- Show-Kompatibilität mit dem Diamond 4 Titan:
Shows können nun problemlos ausgetauscht werden zwischen dem Pearl Expert, Tiger Touch, Titan Mobile und dem Diamond 4 Titan.
- Flash buttons did not register when a Swap button was depressed:
Found in version: 3.0
If a Swap button was held down whilst a Flash button was also pressed, the fixtures being flashed did not come on when the Swap button was released.
- Macros with alphanumeric input did not recall correctly:
Found in version: 1.3
Macros did not always recall correctly if they included a numeric or text input.
- Clear LED remained on after New Show or Load Show:
Found in version: 3.1
If the programmer were not empty when a New Show or Load Show was performed the Clear LED would remain lit.
- Changing fixture preset level during swop:
Found in version: 1.1
Changing a fixture's preset fader level whilst swop was active would not store the preset level change resulting in it dropping out to the wrong level.
- Flashing fixture during swop:
Found in version: 2.1
Flashing a fixture whilst swop was active would not register when the swop was released.
- Fade level match to swapped fixture:
Found in version: 1.3
Previously it was not possible to level match a preset fader to a swopped fixture. This is now resolved.
- Record memory exited Channel menu:
Found in version: 2.1
If you were latched in the channel menu and recorded a memory you would exit out of the channel menu even though it was latched. You now drop back to the channel menu.
- Playbacks stick when swopping more than one:
Found in version: 2.1
When swapping between two or more playbacks where the playback fader levels were above 0% they would latch on until all swaps were released.
- Visualiser did not update with exchange:
Found in version: 3.1
Visualiser did not correctly auto update when a fixture was exchanged.
- Cue view sometimes showed '-' when setting values:
Found in version: 3.1
Cue View sometimes incorrectly read '-' when setting function values in level view.
- Cue View selection corrupted when changing playbacks:
Found in version: 3.1
If you had a selection in the cue view and you changes to a different playback sometimes the selection was corrupted.
- Slow to change attributes with Channel Grid open:
Found in version: 3.1
With a large show with the channel grid open in output mode sometimes it caused a slow down in changing attribute banks.
- Highlight colours affected by colour picker:
Found in version: 3.1
When using highlight with the colour picker open the colour of the fixtures could unexpectedly change. This is now resolved.
- Dimmer could be left on after clear:
Found in version: 3.1
If you selected a dimmer, located it and pressed clear without putting it in the programmer it could remain lit.
- Off doesn't work correctly with Edit Palette:
Found in version: 3.1
If you tried to use Off in conjunction with Edit palette to remove some attributes from the programmer and did not select the fixtures the Off values would not be merged into the palette.
- Stuck in Record Memory:
Found in version: 3.1
When merging a playback with the record cue menu latched sometimes the record cue menu got stuck. This is now resolved.
- Attribute editor wouldn't scroll:
Found in version: 3.1
Occasionally after starting the software the attribute editor banks would not scroll until you had changed attribute. This is resolved.
- Enter doesn't work in Record View:
Found in version: 3.1
Record View 3 Enter did not record a view - the Enter key was not accepted.
- Crash saving show:
Very rarely the software could crash when saving or loading a show. This has been resolved.
- Workspaces not recalling scroll offsets correctly:
Found in version: 3.1
When recalling a workspace it should recall the scroll offsets of the windows. This didn't always happen reliably.
- Deleting attributes in cue view:
Found in version: 3.1
When deleting some attributes from some fixtures in cue view it dis not update correctly. The view now shows [Off] to indicate where controls have been removed.
- Fixture selection in shape generator:
Found in version: 3.1
When selecting fixtures to adjust individual parameters in the shape generator it would always revert to attribute control instead of shape parameters.
- Flickering LEDs on Expert Touch Wing:
In some circumstances various LEDs on the Expert Touch wing could flicker randomly, the operation of the wing was otherwise unaffected. This can be resolved by updating the wing's firmware with new software distributed with this version of USB Expert. USB Expert help includes instructions for updating panel software.
-
Upgrading from: 3.0:
Please ensure you save and backup your shows before attempting to upgrade any software. An automated upgrade path from version Pearl Expert Titan 3.0 and Tiger Touch 3.0 is provided. Upgrading from any other version requires the running of a Titan 3.0 recovery disk before running the upgrade installer. You can download the latest Titan software from Avolites download. Full instructions for upgrading both with an installer and a recovery disc are supplied with the download and can be found in the console manual. The installer upgade procedure is reproduced briefly here. Please save the software to a USB stick or other media and follow these instructions. Shutdown the software by selecting 'Shutdown Software' from the tools menu. Insert the USB stick in the console and click on the yellow 'Folders' icon on the tools menu of the console. Find the setup file you saved to the USB stick double click to run it. Follow the instructions presented by the installer, taking care to read each step carefully. Once the setup completes you need to restart the console. When the console restarts it should be updated to the new software, please check this by reading the version number in system mode.

- Can't clear included shape from programmer:
If you include a memory that contains a shape but no other attributes it will go into the programmer but the fixtures on which the shape is running will not. If you press clear the shape will not be removed as there are no fixtures in the programmer. To get rid of the shape first select the fixtures then press clear.
- Cannot update personality with multiple modes patched:
If you have more than 2 modes patched for a fixture, the Update Personality function doesn't work.
- Macro legends lost after load show:
Sometimes after loading show macro legends may be lost. Closing and opening the window with the macros in will bring the legends back.
- Custom Visualiser patch may be lost on start up:
Occasionally the patch in Visualiser will be reset to the default when loading up on start up. This does not effect shows saved or loaded through the Disk menu.
- Repatch and park multiple fixtures:
You can now select multiple fixtures in the repatch menu this allows you to park or re-address multiple fixtures at once.
- Colour picker works with both CMY and RGB fixtures:
Now if you select CMY and RGB fixtures the colour picker will apply to both types of fixtures not just the last type you selected.
- Handle window performance:
The opening time and scroll performance of the handle windows (eg Fixtures, Positions, Colours, Playbacks, etc) has been improved, especially for maximised windows.
- Confirm delete in Cue View:
When deleting information from a cue in Cue View you will now be asked to confirm before the information is removed.
- Control fixtures, Shapes and Attributes on wheels:
You can now swop between shape control, the connected playback view and attribute control independent of which menu you are in and whether there is anything in the programmer. Pressing Connect and then a playback will take you to the connected view, pressing an attribute bank button will take you to attribute control and pressing a shape parameter button (in the shape menu) will give you shape control.
- Channel Grid IPCGBES display:
The Channel Grid now has a column that shows which attribute groups are in the programmer for each fixture.
- Channel Grid follows current bank:
When you change attribute bank the channel grid will now attempt to scroll to get those attributes in view.
- Playback view keeps live cue in view:
If you open the Playback View on a playing playback and you have no cue selected it will now auto-scroll to keep the live cue in view.
- Factory workspace for Attribute Editor:
A factory workspace has been added for the Attribute Editor to make it easier to open quickly.
- Scroll offsets for windows stored in workspaces:
The scroll offsets of handle windows are now stored in workspaces so workspaces can be used to jump to various positions in a long list.
- Scroll offsets retained with handle pages:
When you have pages enabled in the handle button windows the scroll offset of each page is stored so if you swap between pages it will return to the scroll offset it was at previously.
- Expert Touch Attribute Wheels User Setting:
When the Expert touch wing is attached by default all attribute control is moved to the three wheels on the wing. Sometimes this is not desirable so a user setting has been added to allow you to retain attribute control on the console even when the wing is attached. In User Settings select 'Attribute Control on Console'
- Visualiser window performance improvement:
The performance of the console has been improved with respect to the visualiser window. The console now doesn't wait for Visualiser to initialise before moving on to other tasks making the console more responsive, especially when loading workspaces.
- Numeric Entry in Shape Generator:
In the shape generator menu you can now type numeric values to assign directly to the shape parameters.
- Groups in Fixture Order Editor:
When setting fixture order in edit times you can now use groups and filtered groups to quickly create patterns.
- Playback view selection:
When you drag to select cells in the playback view it now correctly shows you what selection you will get when you release the button taking into account changing columns and toggling cells. This makes it much easier to select the required cue properties.
- Handle Preview Selection:
When dragging out a selection in the handle button view it now correctly reflects the selection rules. This includes showing fixtures that will drop out of the selection as lowlighted and dynamically showing the selection on the preset LEDs.
- Delete in Patch:
When you exit the patch delete menu you now stay in Patch instead of exiting to the root menu.
- Align mask:
Align fixtures now remembers the align mask when you exit the menu.
- Locate starts new selection:
If you select some fixtures, then press locate then select some more fixtures they will now become the new selection instead of adding to the selection. This is consistent with the rule for changing attributes.
- Enter to confirm attribute time:
In the edit times menu when setting attribute times previously the Enter key did not do anything. Now it toggles between Fade and Delay time. This makes it easier to visually confirm the edit has been accepted.
- Disable quick palettes user option:
A new user setting has been added to disable quick palettes. When quick palettes are disabled you can no longer apply palettes without selecting fixtures first.
- Record steps in cue list within Edit Times:
You can now record additional steps in a cue list while in the edit times menu. Start recording a cue list and then select edit times. You can continue recording additional steps by selecting the playback handle.
- Console startup and shutdown logged:
A log entry is now made every time the console starts or shutsdown. This helps with diagnosing problems or faults.
- Changing fixture selection clears selection pattern:
Previously any selection pattern you applied such as Odd or 1 In 4 remained in effect until you cleared it using All All or by pressing Clear. This could be confusing when selecting additional fixtures because although they were added to the selection they weren't necessarily included in the pattern. To remedy this selection patterns are now cleared whenever you change the fixture selection.
- Visualiser Auto-patch unreliable with fixture exchange, copy and repatch fixtures:
Found in version: 3.0
Visualiser auto-patch previously got out of sync if you exchanged fixtures, copied fixtures or repatched fixtures.
- Visualiser auto-patch rigging positions:
If you patched a large number of fixtures in the Fixtures window and enabled Visualiser Auto-Patch some fixtures could end up outside the confines of the theatre. Now they will wrap around to be contained within the theatre.
- Visualiser theatre beam angles:
When saving the visualiser theatre in the show file it did not correctly retain fixture beam angles, orientations and other parameters set in design mode. All fixture parameters are now retained.
- Visualiser auto-patch created very small fixtures:
The console software did not respect the unit system selected in Visualiser when auto patching fixtures. This meant that if the theatre measurement unit was set to millimetres the fixtures were created 25.4 times smaller than if the unit was set to inches. The patching now works independently of the theatre scale.
- Fixtures loaded into programmer when selecting for include:
In advanced include, when selecting which fixtures in the cue to include, previously all the fixtures in the cue were put in the programmer even if they were deselected and no information was included for those fixtures. The include fixture selection is now independent and will not put fixtures into the programmer until the include is confirmed.
- Fixtures loaded into programmer when selecting for Fixture Order:
When setting fixture order on a playback all fixtures selected for any step would be put into the programmer even though fixture order is not a programmer function. Fixtures are no longer put in the programmer.
- Assign value to wheel C with touch wing:
On an Expert with a Touch wing attached you couldn't assign a value to wheel C in the numeric entry menu. Now when a wing is attached an extra softkey appears to assign to wheel C.
- Could not click on Autoload in Playback View:
Having selected one or more cues in playback view to create an autoload you could not select different cues unless you exited the autoload menu. Now you can carry on and select different cues without leaving the menu.
- u.a syntax for setting DMX addresses:
In the patch menu the ability to specify a DMX universe and address by typing Universe.Address in the address box stopped working in version 3.0. It now works correctly.
- Console slowdown with Visualiser:
If you had visualiser open with Auto-patch switched on and you repatched a lot of fixtures the console would significantly slow down and a show saved in this state would sometimes fail to load. This has been resolved.
- IPCGBES touch screen buttons didn't roll banks correctly:
If you selected a fixture with multiple layers of attributes on multiple banks (eg the Gobo banks of the Martin Mac 2000 Performance) repeatedly pressing one of the group button would not correctly roll through all the available attribute bank layers.
- Move allowed you to move out of view:
Previously if you selected a range of items from right to left then selected a destination position such that some of the items were at negative indexes the move would succeed but it was then difficult to get at those items. You are now prevented from moving items to negative indexes.
- Patch address did not highlight on patch:
When you patched a fixture it did not select the address field so you had to delete it to type the next address. It now selects the field when you patch a fixture so that you can immediately type the next address.
- Connected playback view showed inserted cues in wrong order:
On the Tiger Touch the connected playback view displayed inserted cues at the end of the list rather than at their correct position.
- Clear LED could get out of sync when using channel grid:
Using the channel grid it was possible to put things in the programmer and not have the Clear LED come on, this is resolved.
- Changes in Unfold not reflected in Playback View:
Setting the legend on a cue or deleting a cue in unfold failed to update the playback view.
- Unfold not shown correctly in playback view:
Very rarely when unfolding a chase the playback view would not show the unfolded handles. This is resolved.
- Playback LEDs didn't light:
On the Tiger Touch when the console was powered on the playback LEDs didn't light to show which handles were occupied until you changed page, fired the playback or loaded a show.
- Attribute bank LEDs stuck on:
In some cases pressing clear or locate soon after loading a show could cause the attribute bank LEDs to get stuck on.
- Fixtures not recording correctly:
If a fixture had more than one attribute on the dimmer wheel it would not record into a playback correctly.
- Software does not start:
If the desk type changed from a Diamond 4 and shut down with the virtual panel opened it would no longer open again.
- Attributes in programmer:
Sometimes certain attributes would not display as being in the programmer when they were.
- Software slow down:
When constantly creating and clearing shapes from the programmer the desk would become slower to run over a long period of time.
- Re-firing mode 1 cues:
It was not possible to re-fire the LTP attributes of a mode 1 cue while it was fading out.
- Update personality crash:
The desk would crash when updating a personality that had preset palettes patched.
- Included shapes priority:
A shape that was included from a playback would not have priority to run over a shape already running from an existing playback.
- Shape speed:
The processing of the shape engine has been reduced by ignoring controls that don't exist on any of the fixtures.
- Bounce:
When a chase was set to bounce it stopped when it reached either end of the list.
- Preset swops:
Preset swop keys would release each other. If multiple keys were held down but only one key released they would all get released.
- Update personality preset palettes:
Update personality would not load in preset palettes from the new fixture.
- Masters of swop:
Masters would loose control of fixtures that had been swopped.
- Fixtures not exchanging:
Certain fixtures (eg. Mac 2000 Wash) would loose all information from certain attributes groups when exchanged.
- Exchange fixture could cause crash:
An issue where repeatedly exchanging a group of fixtures to the same type sometimes caused the console to crash has been resolved.
- Exchanging fixtures in groups could cause failures:
When exchanging all the fixtures in one group occasionally the software would stop halfway through the exchange. Exchange now works correctly with groups.
- Preset master:
Preset master would lose control of fixtures that have been cleared from the programmer.
- Fixture exchange attributes:
If an attribute was not in the target fixture during an exchange that information would get lost if exchanged back to a fixture that had the attribute.
- Fixture exchange CMY to RGB:
CMY now maps to RGB after a fixture exchange
- Set legend range select:
If you selected a range of handles in set legend and finished on an empty handle it would not allow you to set any legends.
- Playback buttons IPCGBES indicator:
In the Playbacks window a playback buttons has an IPCGBES indicator to show the content of the cue but it did not correctly reflect the cue contents.
- Attribute window and toggle programmer:
If you repeatedly pressed an attribute button in the attribute window after the fourth press it would stop going in and out of the programmer.
- Channel grid and Attribute Editor with wheel nudge:
With fixture attributes with absolute values such as Gobos nudging the wheel slightly will put the value in the programmer however the Channel Grid and Attribute Editor would not previously reflect this change unless you moved a complete step (eg changed gobo).
- Console freeze when deleting in cue view:
If you had a playback with a shape in it and it was playing and you opened it in cue view and deleted information from it the console could freeze. This is resolved.
- Cue view header labels not aligned:
Occasionally when moving between cues with the cue view open the column headers would not match up with the data in the column.
- Mode 2, 3 Fade out shown as Disabled:
In the edit times menu the Fade Out was shown as disabled for memories in modes 0, 2 & 3. It should only show Disabled for mode 0.
- Channel menu put fixtures in the programmer:
When building selection commands in the channel menu the preview put fixtures into the programmer even if they would never be selected. For example if you typed 1 THRO 20 NOT 5 THRO 15 only 1, 2, 3, 4, 16, 17, 18, 19 and 20 would be selected but 5-15 would still be put in the programmer and would be recorded in record by fixture. The selection is now not committed until you press enter.
- Playback view fails to open on unfolded cues:
If you attempted to open the playback view on an unfolded cue you would get a black window. Now it will open the cue view for that cue.
- Sometimes windows would not open:
The first time you ran the software after a recovery CD or improper shutdown some windows did not open until you resized them or changed the screen they were on. This is resolved.
- Connected Playback View stuck on Paused:
On the Pearl Expert on LCD connected playback view if you paused a running chase then resumed it by pressing Go the display would continue to read Paused until it started the next step. It now goes back to Fade.
- Couldn't apply workspace in View menu:
Whilst in the View menu you couldn't apply a workspace from the Workspaces window.
- Edited group not applying correctly:
If you edited a group in the group menu then you applied the group it would apply the group as if the edit had been lost until you changed page whereupon it would start to apply with the new fixture selection. Now the edit is committed immediately.
- Off menu allowed edit in run mode:
In run mode, if you pressed the Off button twice you could switch fixtures and attributes Off which should not be accessible from Run mode. Now when you press Off in Run mode you can only reach the playback Release functions.
- Highlights mode in Channel Grid:
In version 3 Highlights mode in channel grid stopped working. It now functions correctly, select Highlight Changes from the context menu and changing values will be highlighted in red.
- Incorrect display on Expert LCD when recording cue list:
On an Expert with a Touch wing attached when recording a cue list the LCD screen showed attribute control above the console wheels when in fact attribute control was assigned to the wing wheels. This is resolved.
- Console could boot with panels missing:
Very occasionally after boot up some panels did not appear in USB Expert and would not function to control the software. They required a panel reset to restore to operation. This has been resolved in the latest version of USB Expert.
- Error with chase link loading V2.0 show:
If you loaded a V2.0 show with a chase with no step links set and you set the global link option to 'Always link steps' then it would introduce a delay between steps. This has been resolved, however, when loading V2.0 shows with advanced chase linking options set if you make changes to the chase it may reset the step linking. In version 3.0 onward we suggest you use a cue list for playbacks with complex linking.
- Macro handle buttons load without legends:
When loading a show with macros in any of the handle windows sometimes they would not show legends until you changed workspaces.
- Numeric menu and reversed ranges:
Previously if you tried to use the numeric menu to set a value in a reversed range it would set the complement of the value. For example setting 25% to a Robe Colour Spot 1200 Gobo spin CW function would actually set 75%. Numeric menu now works with normal and reversed ranges.
- Attribute editor scroll glitch:
In the attribute editor if you scrolled to the end of lists of attributes of certain lengths the scrolling the final few pixels would cause the list to jump back one button. It now scrolls smoothly.
- Open workspace window doesn't exit view menu:
Selecting View, Open Workspace Window, then selecting a window took you back to the View menu instead of the root menu. It now returns to the root or a latched menu.
- Open workspace window menu didn't latch:
Although the open workspace window menu was latchable the latch was not effectual. It now latches correctly when selected.
- Keyboard could change screen when toggling Min/Max:
Previously the keyboard stored its absolute screen location for small and large size independently so swapping between them could cause it to change screen. Now it stores the location relative to the current screen.
- Titan window opens on wrong screen:
When first opening the Titan window on an Expert without a wing attached it would open the window on the wing so it would not be visible. Now it will open on the screen the user is working with.
- Mouse pointer appears on wrong screen:
If you booted a Pearl Expert without a touch wing attached it started with the mouse on the wing making it difficult to find. In not starts up with the mouse on the VDU screen.
- Fixtures would appear to be parked after exchange:
When exchanging fixtures the exchanged fixtures would sometimes appear as parked in the Fixture Patch view. The fixtures would be correctly patched but the view was showing the wrong information.
- Deleting a chase returned to record menu:
If you deleted a chase from the record menu then it would return to the record menu for a chase which has been deleted. It now returns to the root menu.
- Running macro which deletes groups could cause panel to freeze:
If you recorded a macro which contained instructions to delete a group then sometimes when running the macro the panel would freeze.
- Recording macro over the top of existing macro:
If you attempted to record a macro over the top of another macro it would warn you but also run the macro. It now only warns you and does not run the macro.
- Incorrect shutdown would cause desk to boot with "A fatal error has ocurred".:
Sometimes when incorrectly shutting down the console by removing the power supply the desk would re-boot with the error message "A fatal error has ocurred.". The only way to resolve the error was to run a recovery disk. The console should now boot correctly if this error ocurrs.
- Channel grid does not update correctly while closed:
If you open the channel grid and then close it, any changes you make to the programmer while the channel grid is closed will not be reflected when you open the channel grid again.
- Pause when changing fixture page with HUD:
With a large amount of programming on the preset handles you might see a pause to fast running chases when changing fixture page with the HUD open. This now does not happen.
- Editting chase in cue view whilst in unfold does not update unfold playbacks.:
If you are editting values in cue view whilst also having the same chase unfolded the unfolded playbacks would not update.
-
Upgrading from: 2.0:
You can upgrade the Tiger Touch from the version 2.0 software using an upgrade installer downloaded from Avolites download. You can also download a complete recovery stick for full system recovery. Full instructions from upgrading both with an installer and a recovery stick are supplied with the download and can be found in the Tiger Touch manual. The installer upgade procedure is reproduced briefly below. Please save the software to a USB stick or other media and follow these instructions. Insert the USB stick in the console and click on the yellow 'Folder Browser' icon on the tools menu of the console. Find the setup file you saved to the USB stick double click to run it. Follow the instructions presented by the installer, taking care to read each step carefully. Once the setup completes you need to restart the console by using the power button at the top left of the front panel. When the console restarts it should be updated to the new software, please check this by reading the version number in system mode.
- Update Personality:
Changes to personalities can mean that you need to update the personality of a fixture in your show. You can update the personality in Patch by selecting [Update Personality]. You are presented with a list of fixtures in your show which you can choose to update. The personality is updated from the Titan personalities folder.
- Pearl Expert Wing:
Added support for the Expert Wing hardware addition. This is an external piece of hardware which you can purchase from Avolites which gives you a touch screen and additional wheels. When the wing is connected the attribute control is done by the three wheels on the wing while chase and cue list control remains on console. You also get an additional screen to move windows to and view information.
- View Playback:
Selecting View and then a playback will open the playback view which contains details about the playback and what is recorded in that playback.
- Window Manipulation:
The workspace windows are arranged in a 2 by 2 grid and each window can occupy any space within this grid. There are 4 controls which allow you to move and resize the windows. To use the control you first need to make the window active by selecting the window header, it should become highlighted.
- Min or Max - toggles the window between occupying all the space available and its current size and position.
- Size and Position - moves the window clockwise around the grid.
- Close - closes the window.
- Close All - closes all the windows.
- Screen - moves the window between the available screens.
When using a tiger touch or an expert wing these controls appear as hard keys but they are also available from the [Window Options] menu under the [View] button. You may also want to see the hotkey controls. Some functions on the hard key require that the shift key is held.- Avo + Close - Close All
- Avo + Size and Position - Screen
- Window Options Menu:
A new [Window Options] menu has been added to the View menu to allow control of the new windows in the workspace. With this menu you can select an active window, move and resize, maximise, change the screen and close a window. This allows full control of a window and its appearance. On the Expert Wing and Tiger Touch there are dedicated buttons for these functions.
- Window Option Shortcut Keys:
The following keyboard shortcut keys allow quick access to window options.
- F1 = Screen
- F2 = Open Workspace Window (Live Search)
- F3 = Min / Max
- F4 = Size / Position
- F5 = Close
- Shift + F5 = Close All
- F6 = Library
- F7 = Fixture
- F8 = Group
- F9 = Colour
- F10 = Position
- F11 = Beam
- F12 = Channel Grid
- On Screen Keyboard:
An on screen keyboard can now appear whenever you need to type. This duplicates the function of the keyboard in the drawer and is primarily for touch screens. You can set the keyboard to open whenever there is typing required by pressing the keyboard button on the top bar and selecting "Auto" when the keyboard opens.
- Media Server Thumbnail Images:
For media servers that support the CITP protocol an image of media clips is displayed in the attribute editor window. The media server must have been patched as an active fixture first.
- Expert Wing Playback Roller Display:
Information about the playbacks on the current roller page is displayed in the bottom of the expert wing screen. This allows you to see the playbacks on the current page and whether they are running. Basic timing information is also presented with current and next step in a cue list.
- Playback View:
The playback view shows information about a playback and in the case of a cue list shows the cues in the playback. The playback view is opened by selecting View and then the playback you want to open or taping the playbacks display on the title of the playback.
- Lists each cue in the playback.
- Provides viewing and editing of the playback times.
- Provides viewing and editing of the playback options.
- Shows the timecode for each cue in the playback.
- Shows the Link for each cue in the playback.
- Shows the current curve for the cue.
- Indicates the live and next cue for a cue list.
- Lets you open a cue for editing.
- Use the wheels to select the next cue and currently selected cue.
Tapping or dragging in the grid takes you to the Edit Times menu or the Playback Options menu to edit the value. - Cue View:
The cue view allows you to view and edit the contents of a cue within a playback. It lists all the fixtures and controls in the cue with the saved values for each control. You can then select values to directly edit the content of the cue. The cue view is opened by first opening the playback view and then selecting the view button of the cue you want to look at.
- Displays all the fixtures in a cue.
- Displays all the controls in the cue.
- Shows the IPCBGES mask for each fixture in the cue.
- Shows the user number and name of each fixture.
- Shows the value of each control saved in the cue. Either the range value or the name of the function is shown.
- The control cells can be switched between displaying Value, Fade and Delay Time and Palettes.
- Select a number of controls and directly edit the values. Any changes will take immediate effect.
- Cue View Remove Attributes:
If you have added fixtures or attributes to a cue you do not want you can remove them using the Cue View. Open the Cue View, select the controls or fixtures you wish to remove and select [Delete] from the Cue View context menu.
- Cue View Time Editing:
When editing attribute times or group times the Cue view window will open on the VDU screen. This shows all the fixtures in the cue, all their attributes and any individual fade and delay times associated with them. You can set times either from the Edit Times menu by selecting with the softkeys and fixture handles or by selecting cells within the grid.
- Window Scrolling with Wheels:
In scroll mode the wheels can be used for scrolling the windows. To enable scroll mode simply press the Scroll Mode key on the Expert Wing or the Tiger Touch and the LED should illuminate to indicate you can now scroll the windows. Press the key again to restore the wheels to their usual function.
- Quick Record:
A new way of quickly recording items into handle windows allows you to double press an empty handle to instantly record a new item on that handle. The item recorded will be determined by the window type so the position palettes window will record a position palette and the groups window will record a new group. When you initially press the empty handle it will turn red with a plus icon, this indicates that another press will record the item. Not all windows support quick record but here is a list of ones that do.
- Groups Window
- Workspace Window
- Playback Window
- All Palette Windows
After you have selected a handle you can type a legend for the new item before you press Enter or [Confirm] - Integrated Visualiser Window:
The Avolites Visualiser has now been integrated into the software so it appears on another workspace window. To see the Visualiser select [Open Window] and then [Visualiser]. You have access to the Visualiser functions such as load and save theatre on the window context menu. It is useful to use the [Screen] button under [Window Options] to move it to the external monitor. There is also a new factory macro for opening Visualiser directly.
- Visualiser Patch Synchronisation:
The Visualiser now updates when you patch or repatch fixtures. You no longer have to close and reload Visualiser to update your patch.
- Visualiser Theatre Saved With Show:
The Visualiser theatre is now saved with the show file and restored when the the show is loaded.
- Attribute Editor:
The attribute editor window provides a touch friendly way of selecting fixture attributes and choosing values for a fixture. The editor is split into a control selection area on the left and a function viewer area on the right. The editor is opened either from the [Open Window] menu or through touching the attribute names in the wheel display. You can change the attributes being displayed by selecting a different attribute. This will either show 3 or 6 types of attributes in a list of buttons. Touching any button will apply that value and it should change to blue to indicate it is in the programmer. Selecting the attribute again will take it out of the programmer. The title of each attribute is displayed in the column header and this can be touched to expand out the item and display more functions. When the chosen function is a range value you can change the value by holding down the button and sliding your finger left and right, a slide bar appears showing the current value in the range. You can also select the attributes being displayed by clicking on the physical bank buttons.
- Colour Picker:
The colour picker appears when viewing CMY or RGB colour fixtures in the attribute editor. It allows you to quickly and easily select a colour. When you touch a colour a magnifying glass appears to help you select the colour you want.
- Marquee Selection:
When dragging in the handles window you now have a 'Marquee' style selection. This allows you to patch and select fixtures in columns, rows or rectangular groups. This makes it much easier to work with fixtures that are patched in an arrangement that represents where they are on the rig.
- Workspace Handle Windows:
Four new windows have been added to store and organise palettes and groups. These are 'Groups', 'Colours', 'Positions' and 'Gobos and Beams'. They are accessed using the hardware keys or from the Open Workspace Window menu. There is a also a factory workspace called 'Groups and Palettes' which will open all four windows. Into these windows you can store palettes and groups arranged by type. You may store as many items as you like, as you record items more buttons will be added. You can record using the existing Record menus or the Quick Record function described below.
- Macros Window:
A handle window has been added to store macros. It can opened by Selecting [Open Workspace Window] from the root menu and selecting [Macros]. It allows you to store as many macros as you wish. The first ten macros will appear on the dedicated macro buttons on the Tiger Touch and Expert Touch.
- Fixtures Window:
A handle window has been added to store fixtures. Press the Fixtures hardware key or select [Open Workspace Window], [Fixtures] to open the Fixtures window. Here you can patch as many fixtures as you wish laid out in either a scrolling view or on pages using the [Show Pages] context menu button.
- Pages in handle windows:
Each of the new handle windows (Fixtures, Groups, Colours, Beams, Positions, etc) can have page buttons enabled or disabled. In the context menu of a handle window select [Pages Show] to show a list of pages on the left hand side of the window. You can use these pages as a fast alternative to scrolling the window. You can name pages by using [Set Legend].
- Shapes Window:
The new shapes window allows you to quickly create shapes for the fixtures in the editor. Select some fixtures then open the Shapes window by using [Open Workspace Window] then selecting [Shapes]. The shapes window shows all the shapes that could be applied to the context fixture. Use the attribute bank buttons to select shapes for a particular attributes such as position or colour. Selecting a shape button will create a new shape on the selected fixtures and take you to the shape editor to set the properties of the shape.
- Open Workspace Window:
A new button has been added to the root menu to open a workspace window. Select [Open Workspace Window] then select the window you wish to open. The window will be opened, brought to the front and focused. This menu allows you to open most of the workspace windows including Playbacks, Fixtures, Groups, Colours, Positions, Gobos and Beams, HUD, Channel Grid, Macros, Shapes, Attribute Editor, Visualiser, Fixtures and Playbacks and Groups and Palettes
- Save Workspace:
The set of windows that are open on all attached screens and their size, position and display options can all be stored in a Workspace for easy recall. You can record a Workspace by holding down Avo and pressing View. You can then give the workspace a name and select which windows you wish to record. Then press a workspace button on a Tiger Touch or an Expert Touch or a grey palette button on an Expert. Pressing that button subsequently will set all the windows to the positions you recorded. Workspaces you record will be saved with the show.
- Editor Status Bar:
On the Expert Wing And Tiger Touch screen above the window area the console now tells you which fixtures or groups are currently selected. This allows you to see which fixtures will be affected even if they aren't visible.
- Move Handles From Compatibility Mode:
If you load a show created on the version 2 software or on an Expert and wish to move all the mixed content from the blue and grey preset handles to the Fixtures, Groups, Playbacks, Colours, Positions and Gobos and Beams windows you can do so easily using the Move to Workspace function. Open the compatibility view and select the [Fixtures and Playbacks] window or the [Palettes and Groups] window. From the context menu select [Move to Workspace] then [Confirm] from the softkey menu. This will move the handles from the compatibility window you selected. Repeat to move content from the other compatibility window.
- Go Back:
There is a new key action for Cue Lists which runs the previous cue in the the cue list. Setting the blue and grey keys to Go and Go Back respectively allows you to easily step forward and back through lists.
- Select Attribute Bank on Touch Screen:
You can now select attribute bank on the touch screen by touching the IPCGBES indicator on the Tiger Touch and Expert Touch. Touching an attribute multiple times cycles though the available pages.
- Link and Link Offset:
Link has been overhauled to make it easier to understand and more powerful. For chases the options previously called 'Link From Last Cue On/Off' are now called 'Link After Previous Cue' and 'Link Wait For Go' respectively. The Cue Overlap function for chases has been removed, you should use a linked cue list instead. With Cue Lists there are now three options, 'Link Wait For Go', 'Link After Previous Cue' and 'Link With Previous Cue'. A Link Offset has been added. These work together as follows.
- 'Link Wait For Go' - The cue waits then fires immediately the Go button is pressed. The Link Offset is disabled.
- 'Link After Previous Cue' - The cue follows on as soon as the previous cue has finished its delay in and fade in time. A Link Offset can be set to add a delay between the first cue completing and this cue triggering. The offset can be specified either as a time or a percentage of the fade time of the previous cue.
- 'Link With Previous Cue' - The cue follows on as soon as the previous cue is triggered. A Link Offset can be set to add a delay between the previous cue starting and this cue starting. The Link Offset can be set either as a time in seconds or as a percentage of the fade time of the previous cue.
These options allow you to create complex self timed sequences by building up simple steps. For example if you wanted the following effect- Go is pressed, Fixture one starts fading up over 20s
- After 10s Fixture two fades up over 15s
- Both lights stay on for 5s
- Both lights go off in 3s
You could program- Cue 1 - Fixture 1 @ 100%, Fade In 20s, Link Wait For Go
- Cue 2 - Fixture 2 @ 100%, Fade In 15s, Link With Previous, Link Offset 10s
- Cue 3 - Fixture 1 AND 2 @ 0%, Fade Out 3s, Link After Previous, Link Offset 5s
- Window Pop-up Context Menu:
On the Pearl Expert if you do not have a wing attached a button appears in the top right hand corner of each window. Clicking this button reveals a pop-up context menu for that window. A dedicated close button is also added for convenience.
- Latch Fixture:
A new key profile function 'Latch' is provided for working with fixtures on the touch screen. Touching once is equivalent to putting the preset fader to full for that fixture and touching again returns the fader to 0. In program mode this puts the fixture in the programmer, in run mode it does not.
- Display Settings In System Mode:
A Display Settings menu has been added in System mode which allows you to configure what external screens or wings you have attached. We recommend always using at least one external screen with the Pearl Expert, either a monitor or a wing, on the Tiger Touch the external screen is sometimes helpful. For best performance disable any screens that are not attached. When you enable and disable screens windows will move to an enabled screen. When opening new windows they will attempt to open on the screen where they were last used. You cannot disable the built in touch screen on the Tiger Touch.
- Factory Macro Library:
A number of macros have been added to the built-in macro library. You can assign these to buttons using the Macro, [Assign To Handle] function.
- List of Cues when including from Cue List:
When including from a cue list it displays a list of cues in the cue list from which to select.
- Patching Active Fixture Progress Prompt:
Patching an active fixture can take some time so a prompt is now displayed to reassure the user.
- WPF Logging:
Status information from the WPF rendering system is now logged in the panel server exception log.
- Unique Names for Block Shapes:
In the previous version all block shapes for Position, Colour etc would have the name "Block Shape". As the shapes would never be displayed in a single list this was not a problem. With the new shapes window the names needed to be unique and so the attribute group the block shape applies to has been appended to the name.
- Visualiser Startup Speed:
The time taken for the Visualiser to open has been reduced.
- Handle Visual Styles improved:
The visual style of handle buttons has been improved to make is easier to differentiate playbacks from fixtures and between fixtures that are selected and in the editor.
- HUD Integration:
The HUD windows have been integrated with the workspace windows making them easier to manage with the hardware keys. The HUD layout can now be save in a Workspace allowing you to quickly save and recall HUD layouts. The old VDU views have been moved into the HUD window context menu.
- Handle Pages Reset On New Show:
When you start a new show the handle pages now reset to their default values.
- Wheel Consistency:
The Shape speed, Shape Size and Chase Speed wheels have been harmonised so that turning the wheel clockwise always makes the chase or shape go faster or larger.
- Button Labelling In Playback Display:
If you set a long legend on a cue in a cue list the button label would show the middle part of the legend and not the button function. Now it always shows the button function and as much legend as will fit.
- Warning Icons:
The Tiger Touch now has the ability to show warnings in the softkeys in line with the Expert. Warning icons will be shown if a function is currently unavailable, to warn that you may have made a mistake or to warn of possibly unexpected side effects. Consult the manual for detailed information on a particular warning.
- Group Selection Display:
Groups now show as deselected when all the fixtures in the group are removed from the programmer, not just when you press Clear. This makes it easier to work with groups in a show environment where you rarely press Clear.
- Switch Channel Grid Between Levels, Palettes and Playbacks:
The Channel Grid can now show levels, palette names or controlling playbacks for all the controls on all patched fixtures or for fixtures in the programmer. Switching between these views allows you to quickly determine what a fixture is doing and why and to understand exactly what is being recorded in a cue. This option is also stored in a workspace.
- Fan With One Fixture Selected:
If you have fan selected and only one fixture previously the wheels would not change the fixture attributes. Now Fan is ignored if only one fixture is selected.
- Channel Grid Show Off:
The Channel Grid now indicates when fixture attributes in the programmer are set to OFF.
- Channel Grid Performance:
The speed and reliability of the Channel Grid have been significantly improved.
- Channel Grid Palette Name reliability:
The reliability of the channel grid has been improved when showing palette names. It now updates correctly if a palette changes even if the underlying value doesn't. It also updates correctly when opening the grid and changing display mode.
- Editing Values In Channel Grid:
You can now edit and clear values directly in the channel grid. Open the grid in Output or Program mode, drag select some cells and either type a new value on the key pad or select a function from the softkey menu. Pressing Enter sets the value in the programmer. The softkey menu also has a Clear button to remove the selected attributes from the programmer.
- Virtual Keyboard Auto Pop-Up Control:
There is now a button on the virtual keyboard to control whether it pops up automatically when text input is required. The option defaults to on unless a hardware keyboard is attached. In either case the behaviour can be overridden by toggling the button which is in the top right next to Min/Max.
- Virtual Keyboard Shows Case:
The virtual keyboard now reflects the state of the shift button by showing the key legends in the correct case.
- Touch Screen Calibration Shown In Front:
Previously the top touch screen calibration point could be obscured by the toolbar. The calibration window is now brought to the front.
- Mask Settings Retained:
All the mask settings (such as Clear mask, Locate mask, Palette Record mask, etc) are now retained when you restart the console and when you reload a show.
- Store Macro Anywhere:
You can now store a macro on any assignable hardware or virtual handle. This allows you to store a macro close to the things it operates on.
- Display Resolution In Tools Menu:
On Tiger Touch and Pearl Expert you can now set the display resolution of the external monitor directly from the Tools menu for easy access. Select Tools -> Control Panel -> External Monitor and select the native resolution of your display.
- Copy, Link, Move Menu Clearer:
The Copy, Link, Move menu has been improved by separating the toggle button out to three softkeys. This makes it clearer which one is selected and quicker to change between them. You can still toggle options by pressing the Copy button repeatedly and Avo + Copy still goes directly to Move.
- Dongle Information:
If you start the software without an authorised Avolites Titan Dongle you will now be warned on the VDU and LCD screens.
- Timecode Reliability:
With timecode sources running at speeds other than 24fps timecode controlled cue lists were sometimes jerky. In addition the resilience of Titan to a noisy timecode source has been improved. Previously a jittery timecode could cause a timecoded cue list to jump.
- And, Thro And @ Buttons:
In the Channel menu the grey keys now act as And, Thro, and @ buttons as shown on the Tiger Touch and new Expert laminate.
- Compatibility Handles in Windows:
The compatibility view introduced in the previous version to allow for patching of fixtures and saving of palettes has now been split into two windows.
- Fixtures and Playback
- Groups and Palettes
There is also a new context button which allows you to export the handles to the new windows available.
- When repatching fixture changing user number resets DMX address:
When you are repatching fixtures, if you changed the user number it would reset the DMX Address.
- Incompatibility between D4 personalities and Titan:
Differences in the way personalities were displayed in Titan meant that some personalities would not display function names correctly.
- Editing Handle Numbers in Fixture Patch View:
Found in version: 2.0
An issue with manually assigning handle numbers in the fixture patch view has been resolved. On Tiger Touch if you entered a handle number the page assigned would be 1 more than the page displayed.
- Setting Cue List Delay In To Fractional Amount:
Found in version: 2.0
An issue with assigning fractional delay in times to cue list cues has been resolved. Previously the text input field for 'Delay In' would not accept the decimal point.
- Channel Grid Failed To Load Columns When Switching View:
Found in version: 2.0
There was an issue with the Channel Grid where if you went into Programmer mode and cleared the programmer then went back to Output it would not always reload the columns. This has been fixed.
- Playbacks View Showed Extra Letter:
Found in version: 2.0
A display issue with the Playbacks display has been resolved. When setting a legend on a playback if you deleted all the letters of the legend you had typed the playbacks display would continue to show the first letter until you started to enter a new legend.
- Playbacks View Failed With Deleting Cues In Unfold:
Found in version: 2.0
The Playbacks display had an issue where if a number of cues were deleted in Unfold it could show blank. This has been resolved.
- Connected Playback Wheel View Would Not Update:
Found in version: 2.0
The connected playback wheel view would not update if you added cues whilst the playback was live. In order to update the list of cues you had to disconnect the playback and connect again. Now the view updates dynamically as you add cues.
- Groups Showed Incorrect Number:
Found in version: 2.0
If you recorded groups without a legend then the group handle button would show the handle index of the group instead of the user number. The group button now always shows the user number.
- Fixture LEDs stay lit after delete:
Found in version: 2.0
When deleting a lot of fixtures some LEDs stayed lit until you changed page. This is resolved.
- Attribute Options Assigned To Two Wheels:
Found in version: 2.0
On consoles with three attribute wheels the Attribute Options menu only assigned attributes to two. Now it assigns the correct number of attributes.
- Clear Button Fails To Clear Locate Intensity:
Found in version: 2.0
Occasionally Clear could fail to clear fixture intensity. If you located a fixture so the light came on, edited an individual attribute then cleared that individual attribute the Clear function would no longer clear the fixture's locate values unless you selected the fixture again.
- Replace Shared Palette:
Found in version: 2.0
If you replaced the contents of a shared palette with another shared palette with more than one kind of fixture in the programmer it would only record one fixture type. This is resolved.
- Update Palette:
Found in version: 2.0
If you set a mask in the record palette menu then subsequently used update palette the record palette mask was used to filter the update. This led to updates in the programmer sometimes not getting merged into the palette. Update palette now always records all the changes in the update palette programmer.
- Copy Fixture And Shape:
Found in version: 2.0
If you copied a fixture it would not always be included in all the shapes the source fixture was included in. It now copies all the shape parameters from the source fixture in every cue.
- Crash When Autoloading A List From Itself:
Found in version: 2.0
If you autoloaded a cue list from a cue within that list Titan could crash. This has been resolved.
- Record By Stage From Cues To Cue List:
Found in version: 2.0
Recording a cue list from existing cues using Record By Stage did not work correctly, only the first cue took any information from the live cues. Now all lit fixtures are recorded.
- Entering a new DMX Address on subsequent patches will add to the original address:
This issue is on the Tiger Touch console only and relates to entering a DMX address during patch. After you have patched the first fixture, if you try and type in the next address it will be appended to the end. To get around this press the right arrow key before inputting a value to clear the field.
- Fixtures auto patched in Visualiser appear really small:
If the default theatre is set to blankmm.ttr (instead of blackinches.ttr) or the user loads in a theatre file originally created from the blackmm.ttr theatre, new fixtures added to the theatre automatically (on patch or copy) will appear really small. To resolve this issue load the blankinches.ttr theatre and then close and re-open Visualiser.
- Loading Chases from V2.0 Show can result in delay between steps:
When you load a chase from a V2.0 show it will load the link as With Previous, most of the time this is not a problem and has no effect. However if you set the global link to "Always Link Steps" it will become "Link After" with 100% offset causing a delay after each step. To fix this you need to toggle the link on each step in playback view.
- When selecting handles backwards it is possible to move them off the page:
When moving items if you select the items backwards it is easy to select a handle which moves some handles off the page. To fix this either do not select items backwards or once done use view fixture patch to re-assign the handles.
- Very ocassionaly unfolded steps are not correctly displayed in HUD:
Ocassionally if you unfold the chase the HUD will not display all the unfolded steps. Closing and opening the HUD will fix the problem.
- Auto-palettes overwrite user palettes:
When patching a fixture with auto-palettes if there are any user palettes in the way they will be deleted. It is a good idea to avoid the user palettes being in the way of auto palettes by moving them first.
- Cue view does not show shapes:
Selecting to show shapes in cue view will not work and no shapes are displayed.
- Auto patch in Visualiser can cause slowdown:
With Visualiser open and set to automatically update any changes to the fixture patch may become slow. This is particularly a problem with parking fixtures but may also occur when fixtures are copied. To fix this problem switch "Auto Update" option to "Update Disabled" or close Visualiser window.
- Individual Playback Key Profile:
Each playback can now be assigned individual key profiles to customise what the panel buttons do for each playback. You can change the key profile for a playback in [Playback Options] by selecting "Key Profile". A list of available profiles are provided or you could add a new one. When set to “None” the default global profile is used.
- In Programmer Indication:
Whether a fixture is in the programmer is now displayed on the HUD, Fixture LEDs and the LCD Intensity view. On the Head Up Display a fixture in the programmer is indicated by a dark blue highlight. On the LED’s it is not indicated by default but you can change the level in the user settings to indicate the In Programmer state. On the LCD screen the level of the fixture is underlined when in the programmer.
- Set playback and fixture page legends:
You can now set the legend for playback and fixture pages, each page has its own legend. To change the legend, select "Set Legend" and then "Page Legends". You edit the legend for the current page and you will need to change page to set a different pages legend. The legends are displayed in the main prompt on the LCD screen and in the HUD.
- Fixture Selection Highlight in Visualiser:
The currently selected fixtures are now highlighted in blue within the Avolites Visualiser application.
- Change LED Levels:
You can now change the LED levels used to indicate the different state of items on the handle. This can be useful if you are in a bright environment and can not see the LEDs properly. To set the intensity of the LEDs go to User Settings and select "LED Levels". You can then select the different levels to change Empty, Occupied Handle, Selected and In Programmer. The level is adjusted on the wheels.
- Next/Previous Chase Step:
Use the Forwards [->] and Backwards [<-] keys to move to the next or previous step when a chase that is paused. You need to connect the chase first and select stop.
- Preload:
You can now preload any cue, chase or cue list simply by pressing either the blue or grey handle keys. This will initialise any fixtures in the playback that are not active in any other playbacks. To use preload you must have setup a key profile that assigns preload to either the grey or blue keys (you can edit Key Profiles in the system menu)
- View Key Profile:
When you are editing key profiles in the system menu it now displays all the key assignments for the whole profile on the LCD screen. This allows you to see quickly what action is assigned to which button. There are two ways you can view the profile. The first is to turn the key to System, select Key Profiles | View Profile and then select the profile you want to see. You can also view the profile when you create it or edit it by selecting "Add Profile" in the key profiles menu.
- Copy Key Profiles:
When adding a new profile you can select an existing profile to copy the settings from
- Cue List Timecode:
Timecode on a cue list allows you to play a cue list automatically from one of the supported timecode sources. It currently supports four sources Clock, Internal, MIDI and Winamp. Each step in the cue list is assigned a time at which that step will run. To set up timecode you first play and connect to the cue list. Then select [Timecode] from the root menu. Change the timecode source to the desired source and the select [Record] to enable recording. It will now record the times as you step the each cue using the [Go] button. Once you have finished press [Record] again to stop recording. To play back you will need to enable the cue list for timecode and enable the timer. You can edit individual timecode times by selecting the cue with wheel A and pressing enter to type in a new value. When editing a value you can also select multiple cues to edit using wheel B and offset the values by a specified amount.
- Change Key Profile in Program:
You can now change the key profile in program mode as well as run mode. Select [Shift(Avo)] and [Select Key Profile].
- Cue List Autoload:
You can assign playbacks to load when a cue list step is fired. To set an Autoload, select [Playback Options] and the cue list you want to assign the autoload to. In playback options select [Autoload]. You should now see a list of cues in the cue list which you can select with the wheel. Select the cue you want to fire a playback in and then select the playback you want to fire using the blue keys. The playback legend should appear on the softkeys. The playback will be fired when the cue starts and killed when it moves to the next cue unless you also autoload the playback into the next step. The softkeys allow you to set the autoload options for the target playbacks. As well as firing a playback you have the facility to go to a specific cue in a cue list or trigger a Go press on a cue list.
- Lock Playback:
You can now lock a playback so it always appears on the current page no matter which page is selected. To lock a playback select [Playback Options] and then the playback you want to lock. Change the "Handle Paging" to "Locked". The handle should now always appear on the current page. You can also set the lock to transparent, in this mode the playback will always appear on the current page if no other playback appears in that position.
- Save and Load Show to USB Stick:
You can now save and load a show directly to and from a USB stick connected to the console. If you have a stick connected and you enter load show it will ask you whether you want to load from the "Internal Hard Drive" or "Removable Disk *:/". Select "Removable Disk" to list all the shows you can load from the USB stick. Save show is similar as it allows you to select the drive when entering the show name. We have also added a list of existing shows to the save show menu so you can easily select a show name that already exists on the console.
- More Attributes on Wheels:
If you select an attribute bank which has more attributes than available wheels then this is indicated by a small arrow in the wheel display. You can then press the attribute bank key again to toggle through the attributes.
- Filtered Palettes:
You can now apply a palette to only the fixtures in a playback by holding the palette key and selecting the playback to apply the palette to.
- Edit Palette:
The edit palette function now restores your original programmer to avoid it breaking your work flow. When you enter edit palette it will save your programmer and then load in the information for the palette you are editing. You can make any adjustments and then exit. The changes to the palette will be saved and your original programmer state loaded. The programmer will be left in exactly the same state as before you started editing the palette.
- Release All Playbacks:
There is a new option in the Off menu to Release all running playbacks to the power on state.
- Apply Group With Pattern:
When applying a group, if you hold down the group button, you can select or type a pattern and only part of the group will be selected. For example, holding down a group and pressing [A] Odd will select just the odd fixtures from that group.
- Macro Recording:
You now have ability to record sequences of key presses as Macros and play them back with a single key press. To record a macro hit [Insert/Macro] then [B] Record and press a vacant preset flash key. The console will then record all your key presses into that macro until you press [Insert/Macro] again. To replay the macro simply hit the key on which you recorded the macro.
- Go To Cue:
You can now go directly to a cue in a running chase or cue list. When a chase or cue list is selected press Connect and type the next cue number followed by ENTER. Alternatively type the cue number in the root menu and hit Connect.
- Intensity Grid View:
The LCD now shows the intensity of all the fixtures on the current page. The fixtures are shown in a grid arranged by handle number. A dot shows a position with a fixture that is not lit. If the fixture is lit the output intensity is shown as a percentage (with FL to represent 100%). If the fixture is in the programmer it will be underlined and if it is selected it will be shown inverted.
- Master Palette Time:
You can now set a master time in the palette menu and all palettes applied will default to fading in that time unless you type a time manually.
- Pattern Selection:
You can now apply a pattern to your selection to work on certain fixtures within your selection. Select some fixtures and press [All] then select a pattern from the softkeys. Built in patterns include 'Odd', 'Even', '1 in 3', '1 in 4' and '1 in 6'. When you apply a pattern, for example '1 in 3', your selection is filtered to show only the first fixture in each group of three. Using the wheels and applying palettes etc will only operate on the first of every group of three. Pressing [Next] will change your selection to the 2nd and 3rd in each group. You can also define your own patterns by typing them on the numeric keypad. The pattern will continue to apply until you either press [Clear] or press [All] twice. This feature lets you quickly and easily build chases and lists that operate on repeating groups of fixtures.
- Playback Priority:
The priority of the playback allows you to determine which playbacks can override each other. With basic LTP it is the latest playback which controls the channel such as colour. Using priority you can prevent a lower priority playback from changing the channel. You can also use the priority to exempt playbacks from being swopped. When you swop a playback it can only take out playbacks at the same or lower priority. Any playbacks with a higher priority will remain on. You can set the priority in playback options and you have 4 levels Low, Normal, High, Very High.
- New clear options menu:
The clear programmer options “Auto Reset Mask”, “Leave Preset Fader Levels” and “Release After Clear” have been moved to a separate [Clear Options] menu. This can be accessed by holding down clear and selecting [Clear Options]
- Include cue in cue list or chase:
When including a cue from a cue list you now see a list of the cues available to include on the LCD screen. Using wheel A, select which cue you want to include (or type in the cue number as before)
- Setting of fade times:
Some changes have been made to make it easier to enter times in the edit times menu.
- When you press enter it will confirm the change and deselect the item (exit will also apply the time)
- Selecting an item again to edit will not deselect the item
- It no longer moves to the next item when enter is pressed
- Always selects the last edit item when entering the times menu
- Attribute mask editing is clearer:
To make it easier to edit the attribute mask it now highlights the attribute groups which are in the mask on the softkeys. Large IPCBGES letters have been added to quickly see which group you are selecting.
- Quick and Advanced include selection made simpler:
Before the selection of quick and advanced include was on a toggle key but it was not always easy to tell which mode you where in. This has now been split onto two softkeys ([Quick] and [Advanced]) and the selected mode is highlighted.
- Patch View New Line:
When in patch view and you press enter, the cursor moves to editing the next row. However if you enter a value that was incorrect it would also move down a line. It now only moves the cursor to the next line if the edit was successful.
- Palette fade time on numeric pad:
An option existed to fix the fade time for a palette in the numeric menu and then set another value such as overlap. This option has been removed so you now just type in the time and select the palette. To set the overlap you need to type the overlap first fix it using the overlap button and then type the fade time followed by selecting the palette.
- Patch view park option:
If you are re-assigning DMX addresses in patch view and you try to assign a DMX address which is in use by another fixture it now asks you if you want to park that fixture.
- Park in patch view:
To park a fixture in the patch view you can just delete the DMX address using the left arrow key (or backspace on the keyboard).
- Locate through channel menu:
Locate now works with channel select commands so you can type 10 THRO 20 [Locate] and it will locate fixtures 10 through to 20.
- Use of punctuation within legends:
You can now use the following punctuation characters in a legend: ( ) ! @ # $ % ^ & * . < > , - + _ = '
- Read only key profiles:
We have made the default key profiles read only so that they can not be edited. This means that when you come to a desk you always know how the default profiles will behave. To customise a profile you just need create your own profile. To help this process we have also added the ability to copy an existing profile when you create a profile.
- Quick profile edit:
The quick profile edit function allows you to easily change the action of a specific key when in program mode. To edit you simply hold down [Shift(Avo)] and select [Edit Key Profile], then select the key you want to change the action for. It will then allow you to choose the action for this key and adjust the profile accordingly. Note that this will change the action for all keys of this type.
- Colour picker:
The colour picker is now displayed on the wheel view in Titan when you select the colour mix bank of a fixture that supports colour mix.
- Set cue legend on cue list or chase:
You can now set a legend on a cue in a cue list from the [Set Legend] menu. When you select a cue list to set the legend on as well as allowing you to input a legend for the playback it also allows you to set a legend for the current cue. A list of all cues in the list is provided on the LCD screen and you can use wheel A to select the cue.
- Release chase playback option:
You can now select a release mask for chases. Previously this was only available for cues or cue lists.
- Fixture attribute control in Run mode:
You can now select fixtures and adjust their attributes in run mode as well as in program mode.
- Release Playback:
Although playback release was in earlier versions it would only release the channels to the power on state. It now releases to the previous playback until no playbacks are left to release and then it goes to the power on level. To enable release you need to set the release mask in playback options. The mask allows you to define which attributes are released. The channels will always release with a fade time of 2 seconds. You can also release a running playback by pressing [Off] and then selecting the playback to release.
- Update Cue List :
When recording a cue list entering an existing cue number will allow you to update an existing cue or insert a cue before or after the specified one.
- Next and Previous Cue in Edit Times and Playback Options:
In Playback Options and Edit Times when a Cue List is selected you can now use the Next [->] and Previous [<-] Cue buttons as well as the wheel to select the cues in the list.
- Swap handles when moving:
There is a new option in the Move Menu ([Avo] + [Photo Copy]) to swap any conflicting target handles. This means that any handles in the way at the destination of the move will be moved to the positions of the source handles. This makes it easier to rearrange handles when the page is nearly full.
- Prevented multiple instances of Visualiser:
Having multiple copies of Visualiser running could cause confusion as to which copy you should be using. The software has been changed to prevent you opening multiple copies. If you try and open a second instance it will simply front the already running copy.
- Cue list link from previous cue was miss named:
In edit times for a cue list step the "Link from Previous Cue" was miss named as "Link to next Step".
- Highlight always highlights selection:
Fixtures are now highlighted if in the selection and highlight is enabled. Before they would only highlight if the selection was in solo mode.
- Delay out in edit times:
The delay out time in edit times now explicitly says it is the same as the Delay In time instead of "None"
- Sometimes keyboard does not work in Windows:
Occasionally the keyboard would not work in Windows because the panel was still expecting you to type something. This has been fixed so the panel releases the keyboard to Windows when the keyboard is not required. The Esc key can also be used to release the keyboard to Windows.
- Unable to snap back past a linked cue:
If you had a cue list which contained a linked cue and you tried to snap back through the steps it would snap back until you reached the linked cue and then remain on that cue.
- Fixture overlap did not work on Mode 1 or 2 when fade time was 0s:
If the fade time of a cue was 0s and you applied overlap in Mode 1 or 2 then the overlap would have no effect.
- Wheel display not updated when changing Intensity in channel menu:
When changing intensity values in channel menu the wheel display was not always updated to reflect the new levels.
- Shapes not fading out:
If a cue had a fade time and you killed the playback the shape would snap out and not fade gracefully.
- Save show suggests “AutoSave” as a name:
The save show function would suggest "AutoSave" or "Shutdown" as a show name when saving a show. It now suggests the name of the currently loaded show or is blank if the show has not been saved.
- Recording empty chase or cue list:
Recording a cue list or chase with no steps would cause the console to behave strangely with those playbacks. The rest of the desk would continue to run normally due to the error recovery system.
- Shape generator, no fixtures warning:
Sometimes the shape generator would warn you that no fixtures where selected even if there were.
- Delete shape stops running shapes:
If you deleted a shape which contained attributes in a live shape on a playback then the live shape would stop running.
- Visualiser not always opening:
If the Visualiser is closed manually using the mouse then [Show Visualiser] option in the view menu would not always work.
- Unable to turn off highlight in Run mode:
If you have highlight enabled and change to run mode you have no way to turn off highlight. This has been changed so you can now turn off highlight in run mode.
- Re-patch ignores the warn before you patch user setting:
When re-patching a fixture it would ask you if you wanted to park a conflicting fixture even if you had the "Warn Before Parking Fixtures" option set to never.
- Grand master applying fixture overlap:
When you changed the grand master level it would fade the playbacks using any overlap set in the times. It now simply masters the intensity without overlap.
- Playbacks would sometimes disconnect:
If you had a playback connected and then used the wheels to edit an attribute value. The connected view for the playback would not return when you pressed clear.
- Chase will not run with 0% xFade and reversed:
If you have a chase with 0% xFade and reversed then it would not run.
- User number box incorrectly appearing in Set Legend:
If you were setting the legend for a cue and you pressed the [Legend] softkey, the user number entry would appear even though you can not set a user number for cues.
- Warning icon in set legend menu:
In the set legend menu a warning icon would appear on User Number whenever you first selected an item. The icon now only appears if the user number is changed to an invalid value.
- Delete Fixture From Patch Only:
You can now only delete fixtures by pressing [Patch] [Delete] this prevents accidental deletion of fixtures and consequential loss of programming.
- Show HUD sometimes only showed part:
Occasionally pressing Show HUD would only show the playback section. It will now show all the sections.
- Fixture Patch View could get outdated:
When repatching and parking fixtures in some cases the fixture patch view could show the old DMX addresses not the current one. This has been resolved.
- Flash locked Mode 2 cues:
Pressing the flash button on a mode 2 cue whilst the cue was fired on the fader would cause it not to return to its start position when the fader was pulled back. You can now flash and swop a mode 2 cue and it will return to the position it had when it was first fired.
- Grand master and Locate:
If a fixture was in the programmer or located the Grand Master would not correctly scale the output level. All outputs are now mastered by the Grand Master.
- Stage View may make Titan unstable:
Please ensure Stage View is closed before changing DMX output or IP address settings.
- Can not save show after entering activation code:
After the Recovery CD has been run and an activation code has been entered Save show will not work until the console is restarted. It is very important to restart the console immediately after entering an Activation code.
- If exchanging a fixture to a type already patched in the show, shared palettes for that type may be overwritten:
After completing the fixture exchange go through all palettes for the same type of fixture updating them as necessary.